

Monster Hunter Wilds presents players with the thrilling task of hunting powerful creatures, gathering their parts, and crafting even stronger gear. While many of the monster hunts are exciting, Zoh Shia stands out as one of the most intense challenges in the game. Unlike other monsters, Zoh Shia requires a strategy that makes use of both its weaknesses and its environment to take down. This guide offers key tips on how to farm Zoh Shia’s parts, activate its crystal mechanic, and ultimately defeat the beast.
Farming Zoh Shia
After your first encounter with Zoh Shia at the end of Chapter Three, it becomes available again after reaching Hunter Rank 50. You can trigger the encounter by speaking to Werner, starting a story quest called “An Unexpected Summons.” However, unlike most monsters, Zoh Shia does not have an additional replayable quest. Here are the main ways to farm Zoh Shia:
- Wait for it to appear randomly: During an Inclemency season, Zoh Shia may show up in Wyveria, though you will need to keep resting to improve the chances of encountering it.
- Save it as an investigation: If Zoh Shia appears in Wyveria, you can use it as an investigation for up to three more battles.
- SOS Quests: Use SOS Quests to assist other hunters in bringing Zoh Shia down.
Zoh Shia won’t appear in Wyveria like other monsters. Instead, you’ll need to wait for the notification in the Environment Overview to know when to challenge it. The battle itself occurs in the Dragontorch Shrine.
Zoh Shia’s Weaknesses
Zoh Shia isn’t an easy target. It uses multiple elements in its attacks, and its offensive power is immense. Here are the key weaknesses to exploit:
- Elemental Weaknesses: Dragon
- Weapon Type Weaknesses: Cut, Blunt
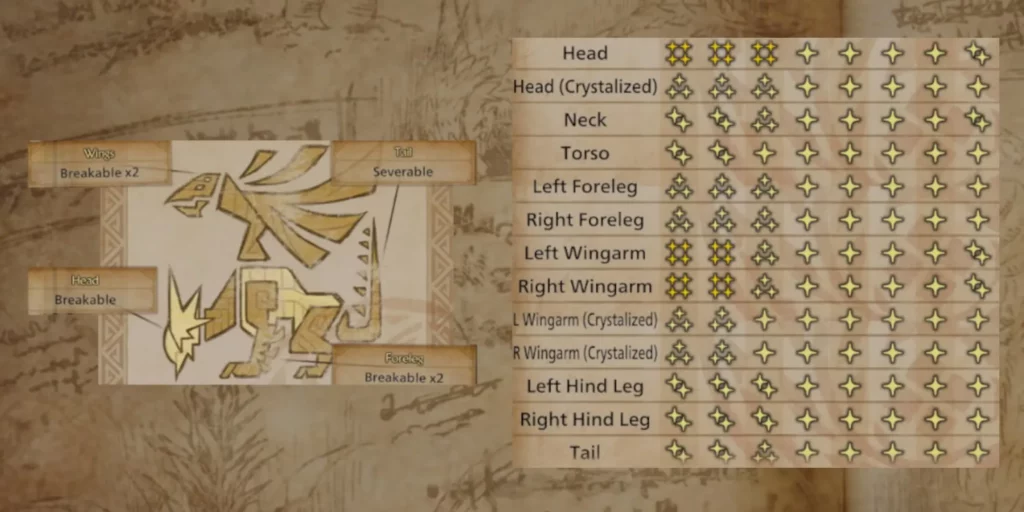
- Breakable Parts: Head, Foreleg x2, Tail (can be severed), Wings x2
- Status Ailments: Blastblight, Paralysis, Poison, Sleep, Stun (with reduced effectiveness)
Activating Zoh Shia’s Crystal Mechanic
One of the most interesting aspects of fighting Zoh Shia is its crystal mechanic. Zoh Shia can create crystals during its attacks, which it then charges with Fire or Thunder elements. These crystals explode shortly after, causing elemental damage to anyone nearby.
To turn this to your advantage, use your slinger with Dragon or Thunder pods to cause the crystals to explode. This will not only damage Zoh Shia but also trigger chain reactions, dealing significant damage. These pods are easily crafted from the Wyrmsbane and Thundercryst that appear in the arena.
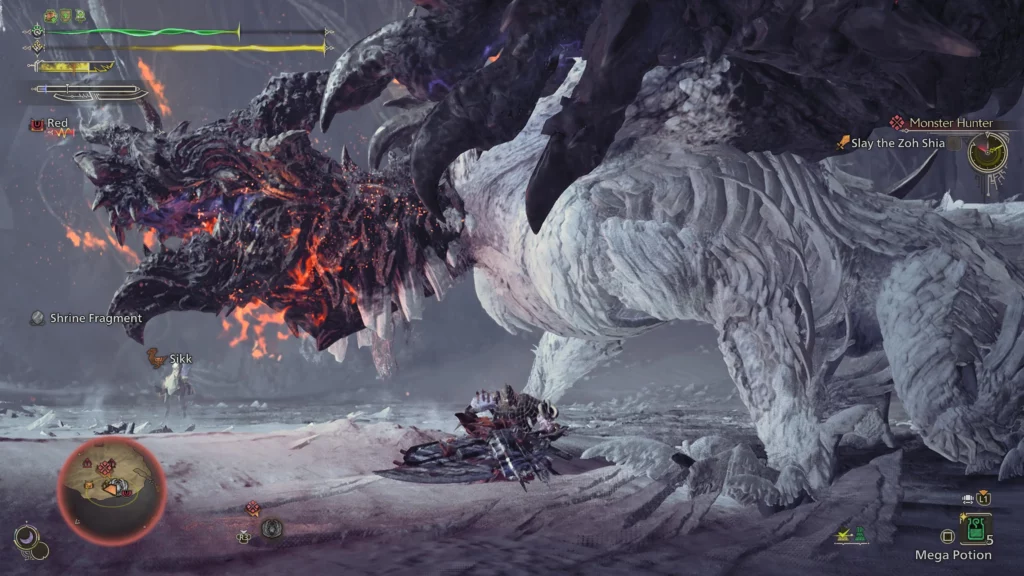
Defeating Zoh Shia
Defeating Zoh Shia is no easy feat. To improve your odds of survival, here are some essential tips:
- Prepare for Fire and Thunder: Equip armor and talismans that offer high resistance to these elements. The Guardian Arkveld armor set and the Blight Charm talisman are particularly useful for Blight Resistance.
- Choose the Right Positioning: Stay near Zoh Shia’s back legs for safety, as this position limits the risk of incoming attacks. However, be prepared to move often as Zoh Shia’s attack patterns evolve.
- Phase Breakdown:
- Phase 1: Zoh Shia is covered in white crystal armor. Breaking the armor deals extra damage, but it will regenerate over time. Mounting Zoh Shia can help you break the armor faster.
- Phase 2: Once the armor breaks, Zoh Shia’s head turns black, enabling fire attacks. Be cautious of fast-moving fireballs and the fiery ground attacks. Use the crystals to destroy armor quicker.
- Phase 3: Zoh Shia takes flight, shedding its wing armor and causing large crystals to emerge from the ground. These crystals will catch fire, creating a hazardous battlefield. You can destroy them early to prevent massive fire damage and create safe zones.
- Final Phase: Zoh Shia becomes fully black and continues its barrage of fire and lightning attacks. It is crucial to trigger the crystals before they explode. The two shrine fragments hanging from the arena should be destroyed to shorten this phase and avoid taking too much damage.
- Phase 1: Zoh Shia is covered in white crystal armor. Breaking the armor deals extra damage, but it will regenerate over time. Mounting Zoh Shia can help you break the armor faster.
Having a coordinated team of hunters will significantly ease the fight, especially when it comes to triggering crystals and managing the attacks.
Zoh Shia’s Drops
Zoh Shia’s parts are valuable for crafting some of the best armor and weapons in the game. Here’s a breakdown of the key materials dropped by Zoh Shia, sorted by frequency:
- Zoh Shia Stakeclaw: Dropped from breaking either Foreleg
- Blackember Mass: Dropped from breaking either Wingarm
- Zoh Shia Crystalhorn: Dropped from breaking the Head
- Zoh Shia Crystaltail
- Guardian Blood +
- Zoh Shia Crystalscale
- Zoh Shia Layershell
- Zoh Shia Certificate S
- Faux Whitegleam Orb
The rewards for defeating Zoh Shia are plentiful, and the difficulty of the hunt makes it all the more satisfying when you succeed. The challenge is intense, but mastering the crystal mechanic and taking advantage of Zoh Shia’s weaknesses will ensure victory.