

Master the Art of Benchmarking PC Games with CapFrameX
In the realm of PC gaming, understanding performance goes beyond a single metric. The Average Frames Per Second (FPS) often steals the spotlight, but true gaming experience hinges on consistency. Games with high average FPS can still feel choppy due to stutters, highlighting the importance of metrics like 1% low and 0.1% low average FPS. These numbers offer insight into the lowest 1% and 0.1% of framerates, providing a clearer picture of gameplay smoothness and responsiveness.
CapFrameX has become a favorite among gamers and critics for its in-depth performance data analysis capabilities. Rather than just showing FPS, CapFrameX records detailed frametimes to offer insights that are more nuanced. Through this guide, we’ll explore setting up CapFrameX, running benchmarks, and understanding results to gain a comprehensive view of your gaming rig’s performance.
What CapFrameX Actually Measures
Running benchmarks with CapFrameX offers more than just a single performance number. It captures per-frame data, transforming it into revealing performance metrics. CapFrameX tracks frametimes—the duration each frame takes to render—and translates these into traditional framerates. Lower frametimes indicate higher framerates, and this data is crucial for uncovering stutters that simple FPS counters might mask.
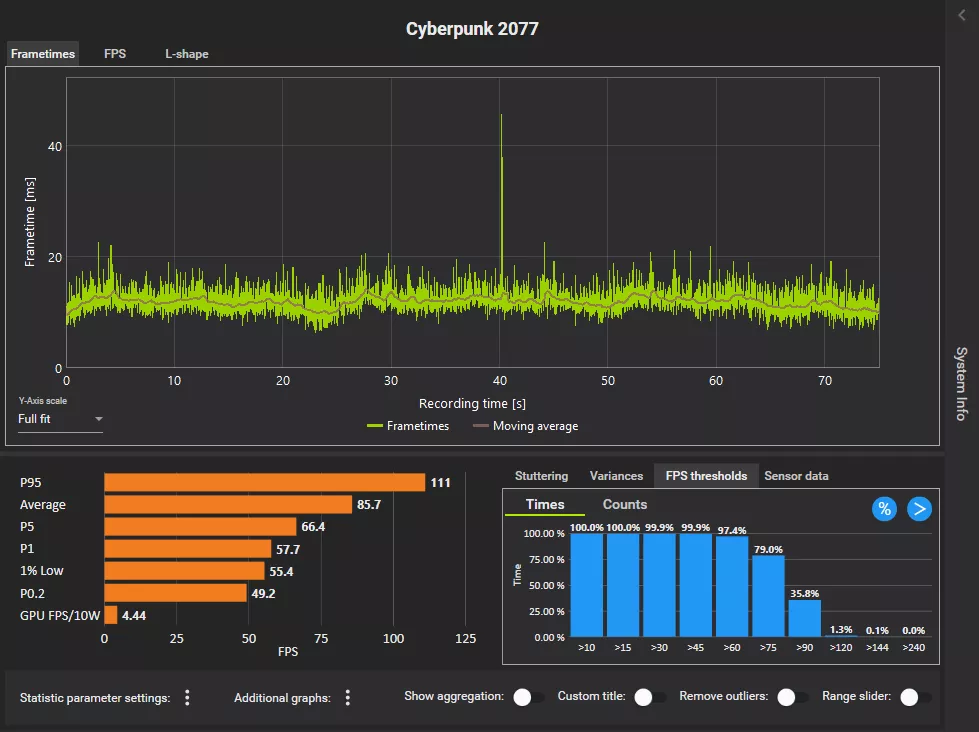
CapFrameX generates several key metrics, with an emphasis on three crucial ones:
- Average FPS: This is the overall framerate across your gaming session, providing a headline figure but not indicating stability.
- 1% Low Average FPS: This metric reflects the average of the worst 1% of framerates, indicating how often performance dips during demanding scenes.
- 0.1% Low Average FPS: This offers insight into rare but severe performance drops, highlighting potential stutters.
CapFrameX’s percentile-based metrics, derived from sorting and analyzing frametimes, allow users to assess both speed and smoothness, making it a preferred tool among the PC gaming community.
Preparing Your System for Benchmarking
Accurate benchmarking requires more than just starting a tool and noting numbers. To ensure reliable results, your system must be consistent and controlled, free from the interference of background applications and potential hardware throttling. Follow these critical steps before running any benchmarks:
Updating Your UEFI BIOS, Operating System, and Drivers
Before any benchmark runs, update your motherboard’s UEFI BIOS, operating system, and drivers. An outdated software environment can lead to performance issues and inconsistencies. Graphics drivers should be cleanly installed to prevent driver-related complications.
Clearing the Benchmarking Environment
Ensure minimal interference by closing unnecessary applications like web browsers, cloud sync apps, and chat software. Disable overlays from platforms like Steam and Xbox Game Bar, and pause antivirus scans during benchmarking if the software is trusted.
Configuring Power and Performance Settings
Disable power throttling by switching to High Performance or Balanced power plans in Windows settings. For laptops, connect to power and deactivate battery-saving features during benchmarking. Set GPUs to maximum performance profiles for consistency.
Monitoring Temperatures and Stability
Use hardware monitoring tools like MSI Afterburner to track CPU/GPU temperatures and ensure they stay within safe ranges under load. Revert to stock settings if aggressive overclocks lead to instability during benchmarks.
Maximizing Consistency
Maintain the same graphical settings for each benchmark capture to ensure comparable results. Avoid system state changes and perform multiple benchmark runs to reduce variance and achieve reliable averages.
Installing and Setting Up CapFrameX
Setting up CapFrameX is straightforward. Follow these steps for reliable captures and meaningful results:
1. Downloading CapFrameX
Visit CapFrameX’s GitHub Releases page and download the latest beta build, choosing between the installer or portable version.
https://github.com/CXWorld/CapFrameX/releases
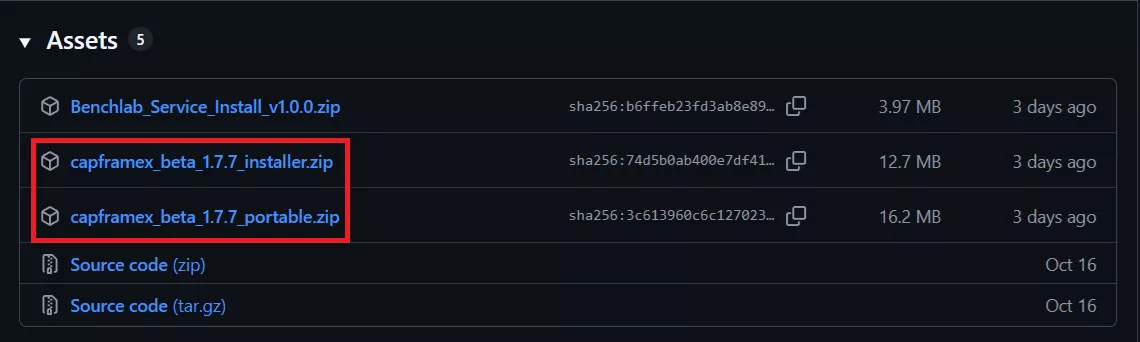
Note that CapFrameX requires .NET Framework 9 or higher on Windows 10/11 to function properly.
2. Optional but Recommended: Installing RTSS for Displaying the Performance Metrics Overlay
To capture frametimes via Intel’s PresentMon backend and show performance data in-game, install the latest Rivatuner Statistics Server (RTSS).
https://www.guru3d.com/download/rtss-rivatuner-statistics-server-download
3. First-Time Launch and Setup
Start CapFrameX:
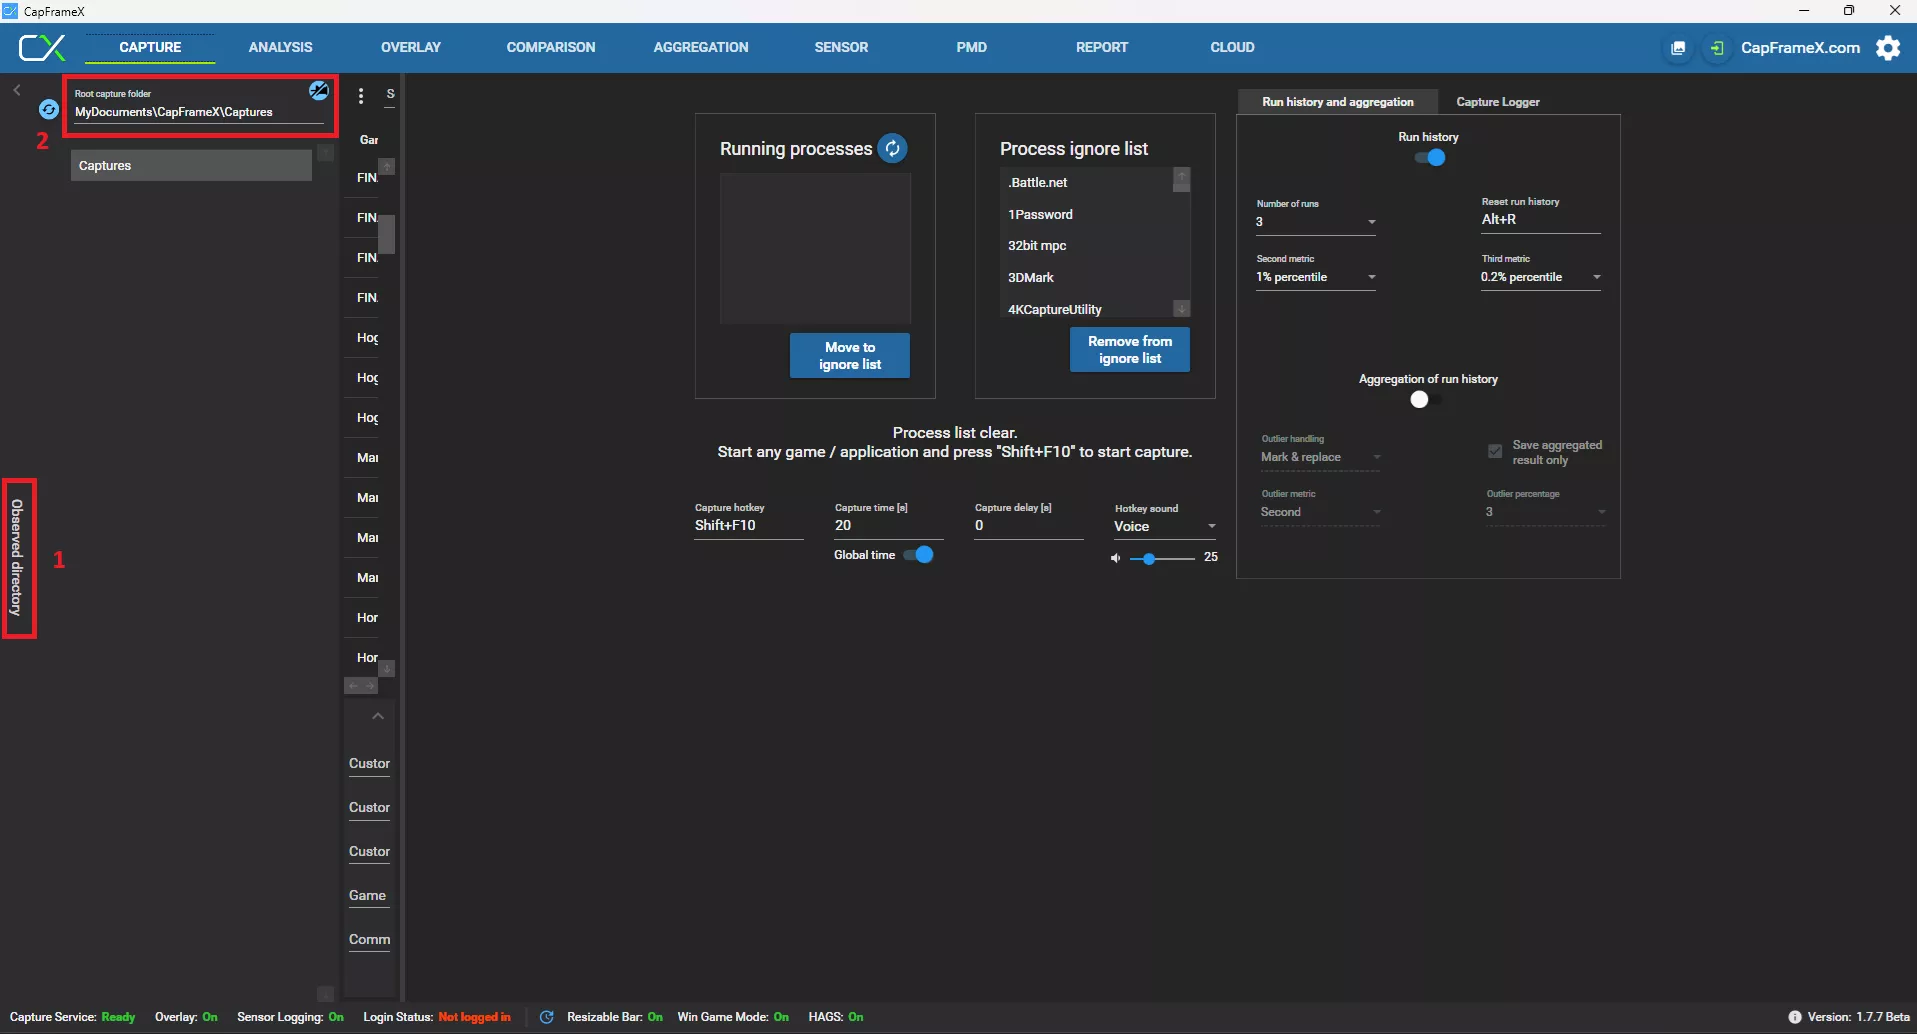
Launch CapFrameX to create necessary configuration and benchmark folders. Close the program once to initialize the folder structure.
Capture Folder Setup:
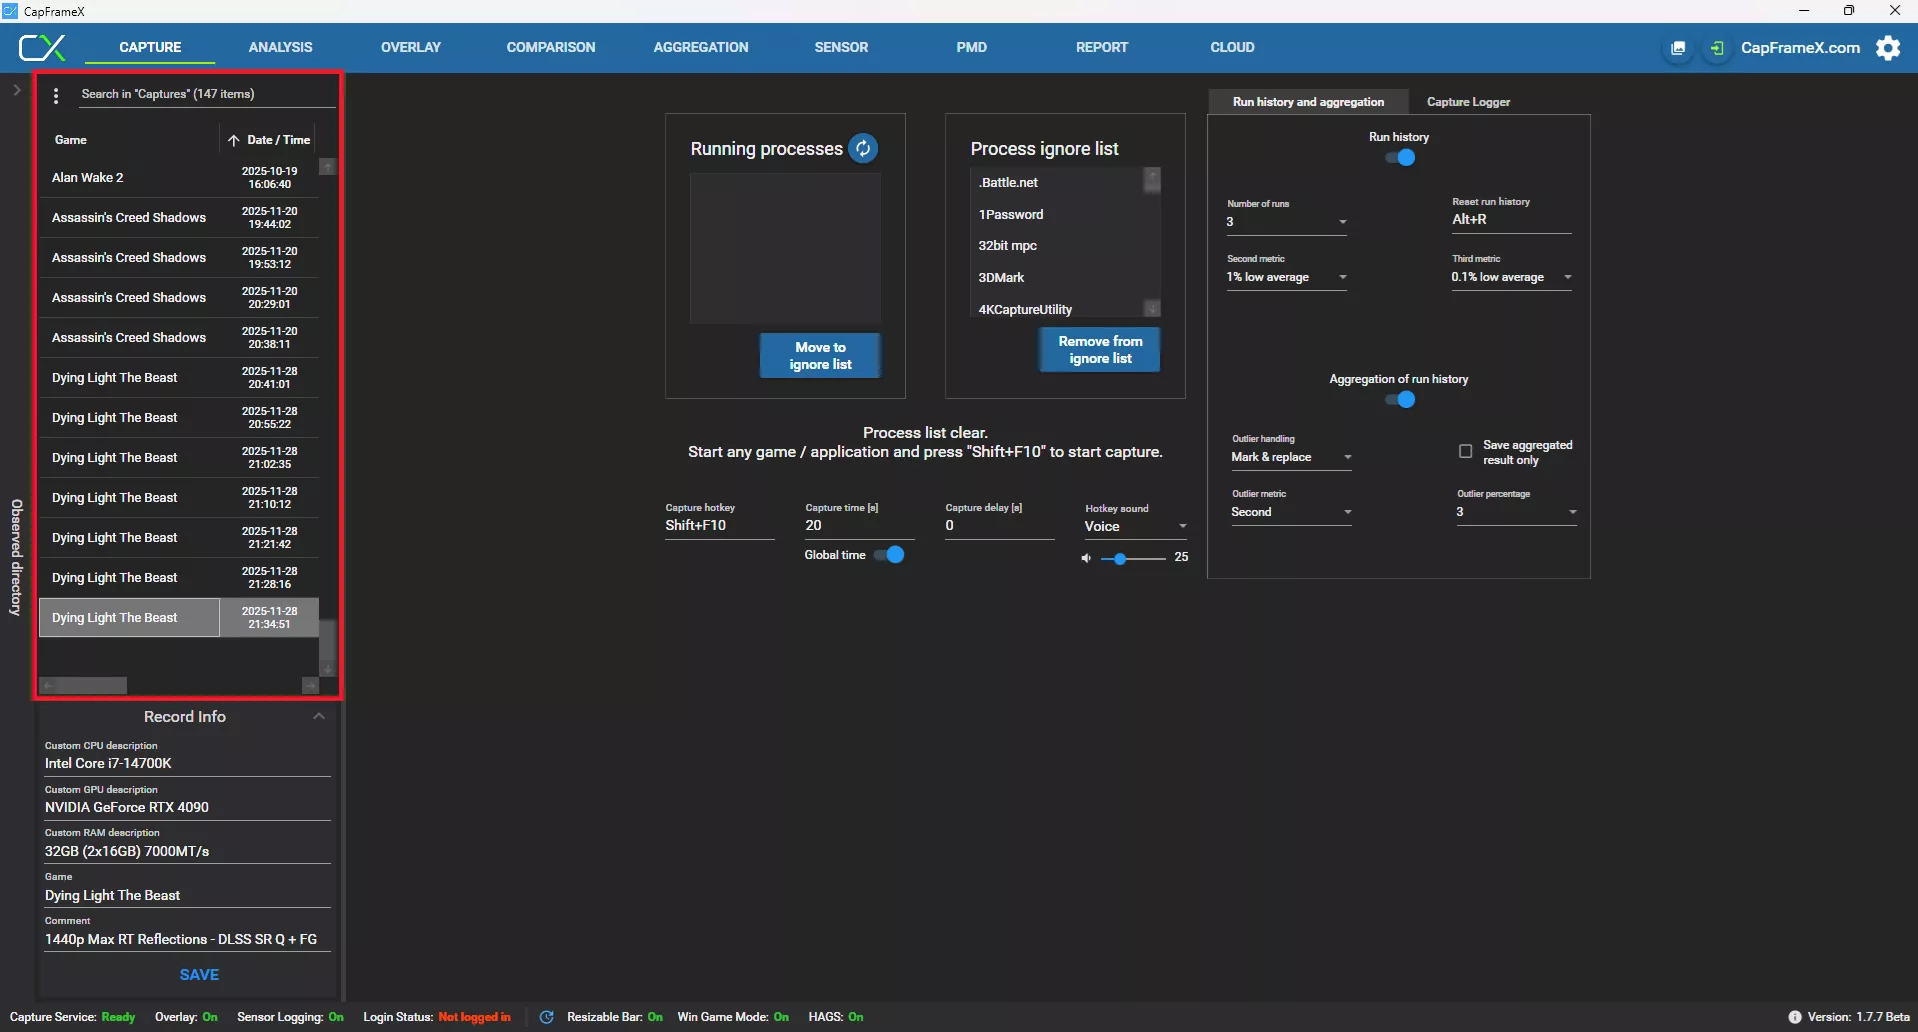
Select the Observed directory button on CapFrameX’s UI to note or change the default directory for storing benchmark captures.
4. Setting Up Capture Options
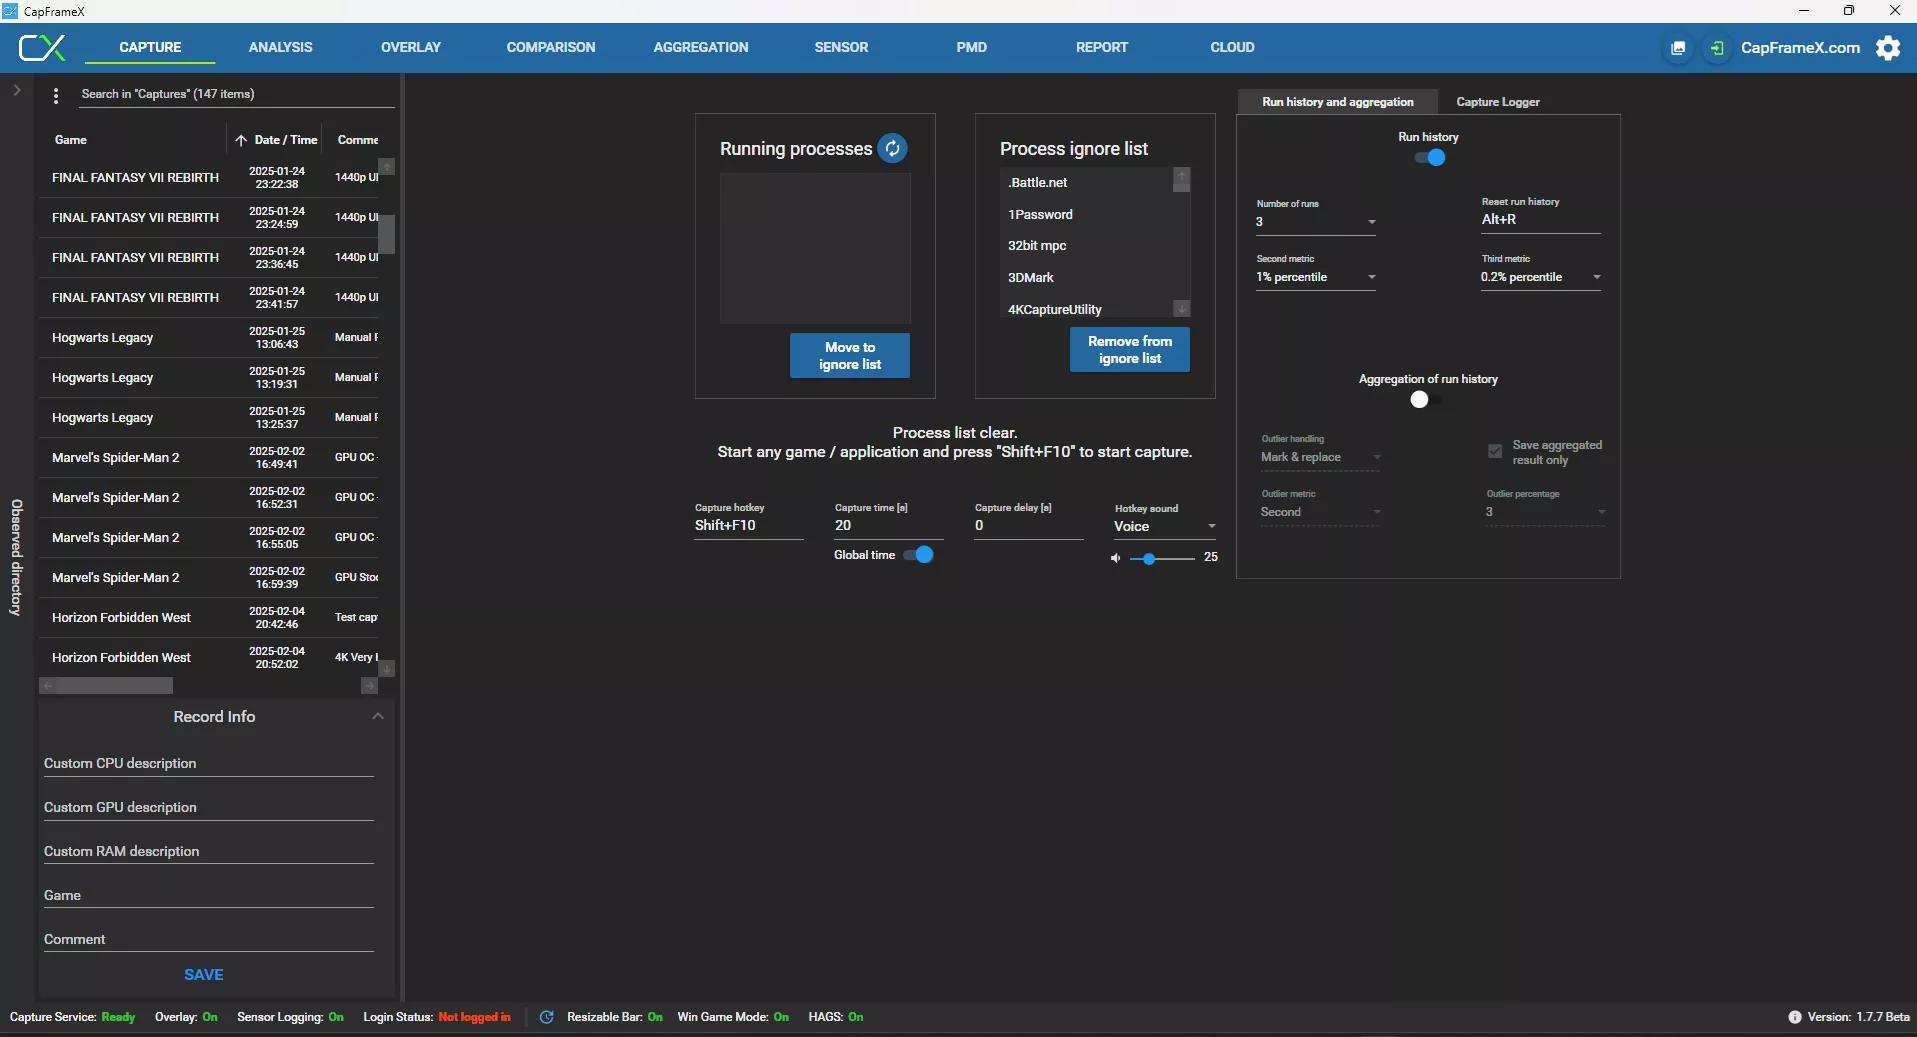
CapFrameX offers customizable capture timings, delays, hotkeys, and sound cues for repeatable benchmarks. Key options include:
- Capture Hotkey: Configure a three-key hotkey combination for starting/stopping captures.
- Capture Time [s]: Set specific times for fixed-length runs or leave it at 0 for manual control.
- Capture Delay [s]: Delay capture start by specifying a positive integer or set it to 0 for no delay.
- Hotkey Sound: Choose sound cues for capture start/end notifications.

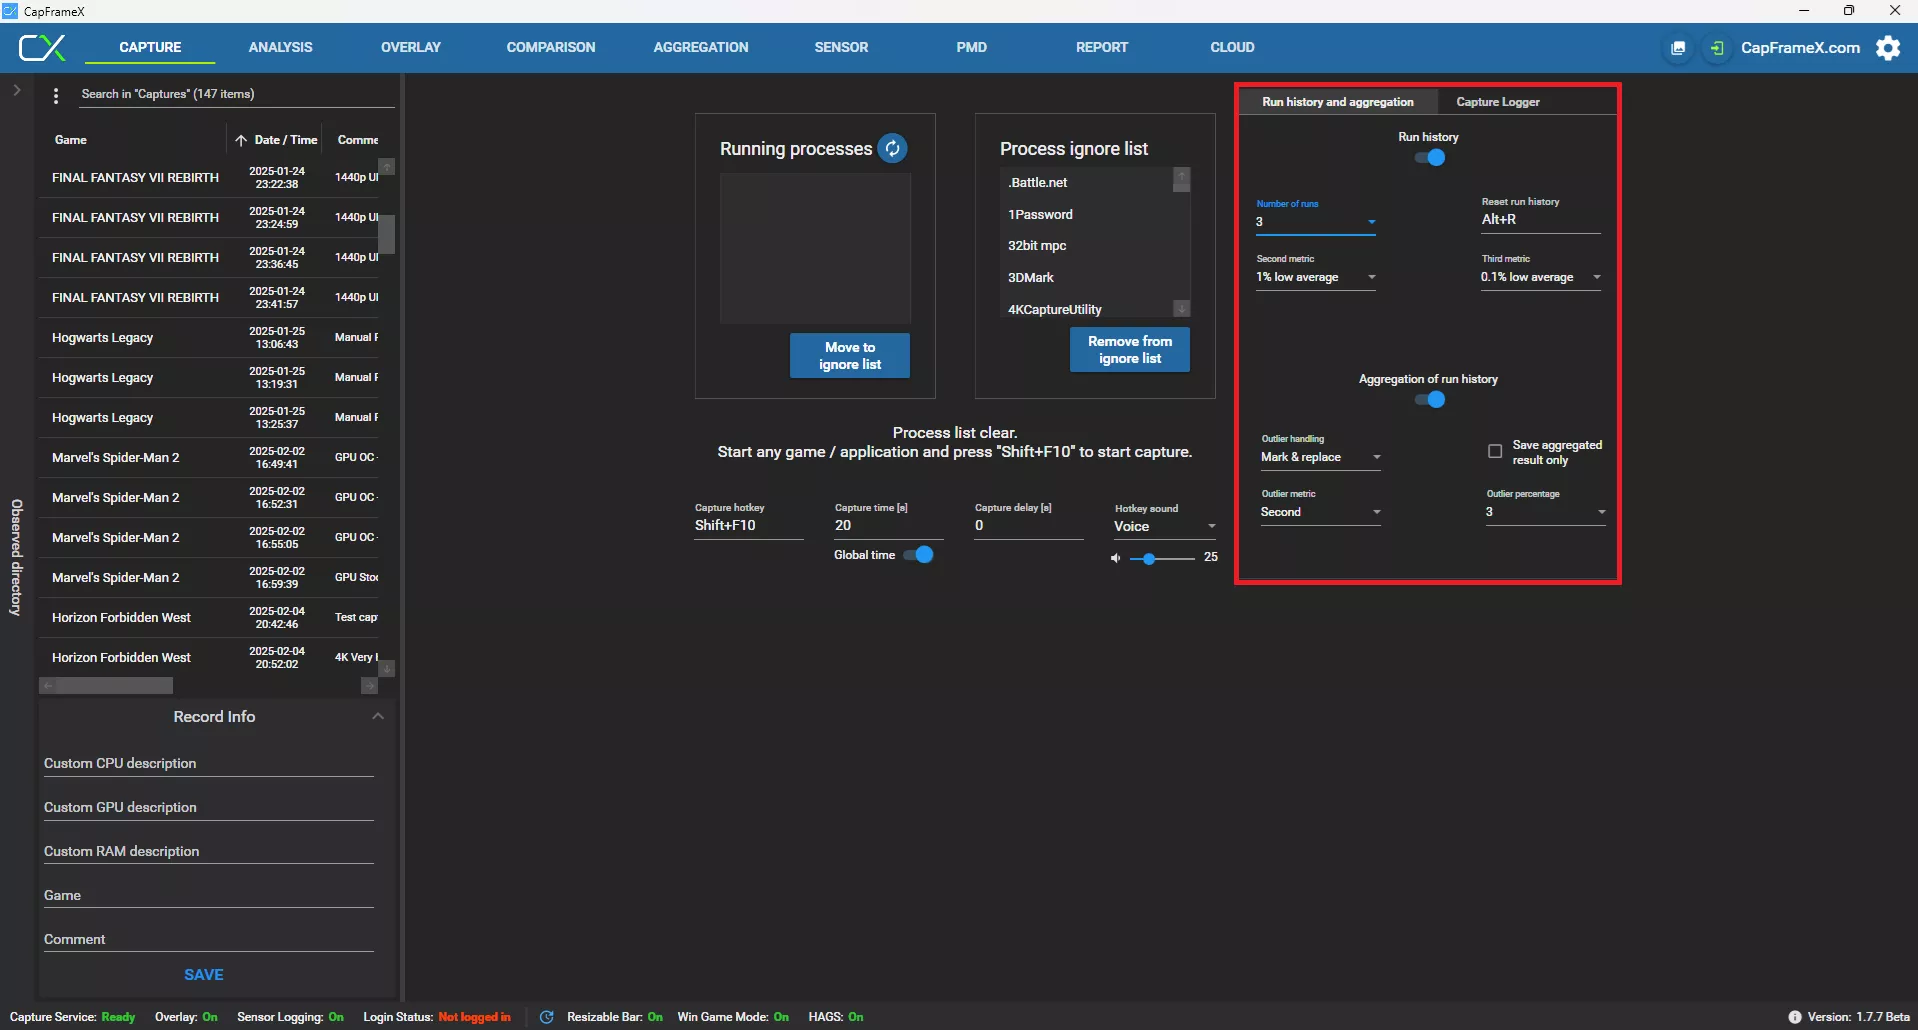
CapFrameX streamlines game benchmarking with features like Run history and aggregation. This includes:
Run History: Tracks recent captures and displays individual or aggregated performance metrics.
- Number of Runs: Specifies how many consecutive captures form a complete run history session before aggregation.
- Reset Run History: Clears stored run history.
- Second and Third Metrics: Adds additional metrics to overlay or report displays.
Aggregation of Run History: Combines runs into a single record file, showing metrics like Average FPS, 1% low, and 0.1% low FPS. This reduces the impact of transient tasks, providing more statistically meaningful data.
- Outlier Handling: Manages unusual runs that deviate significantly from others.
- Save Aggregated Result Only: Saves only the final aggregated file, maintaining a clean directory.
- Outlier Metric: Selects the performance metric for detecting outliers during aggregation.
- Outlier Percentage: Sets the percentage deviation for a run to be considered an outlier.
If these options seem complex, the default values suffice. Focus on correctly interpreting benchmark results.
5. Testing Whether Your CapFrameX Setup Works
With CapFrameX and optionally RTSS running:
- Run a Quick Capture:
Start a game, use your capture hotkey to log gameplay, and verify capture existence in the Captures section. - Adjust Settings if Needed:
Check hotkey settings if captures don’t appear correctly.
6. Tips
- Reset settings or overlay profiles by deleting the configuration folder at
%APPDATA%CapFrameXConfiguration