


FragPunk is widely recognized for its innovative Shard Cards, which significantly alter gameplay dynamics from one round to the next. However, the choice of Lancer—each being a playable character—plays an equally crucial role in determining the outcome of each match. Every Lancer comes equipped with at least three unique Abilities, ranging from mobility boosts and area-of-effect healing to traps and visual impairments. These Abilities define a Lancer’s strengths and limitations, meaning strategies must shift depending on the chosen Lancer, the active Game Mode, and the specific Map.
Gaining mastery over a chosen Lancer’s toolkit, cooperating with optimal team compositions, and learning how to counter opposing Lancers are essential skills. This becomes particularly important since several Lancers aren’t immediately available and must be unlocked using Gold, FragPunk Coins, or Lancer Trophies. Being well-informed before committing resources is highly recommended.
Below is a comprehensive list of every Lancer available in FragPunk along with detailed information on their Abilities.
Read the full review of Fragpunk here.
Lancer Roster Overview
Available Lancers:
- Broker
- Nitro
- Hollowpoint
- Jaguar
- Chum
- Corona
- Serket
- Pathojen
- Zephyr
- Spider
- Kismet
- Axon
- Sonar
Lancer Abilities Breakdown
Broker
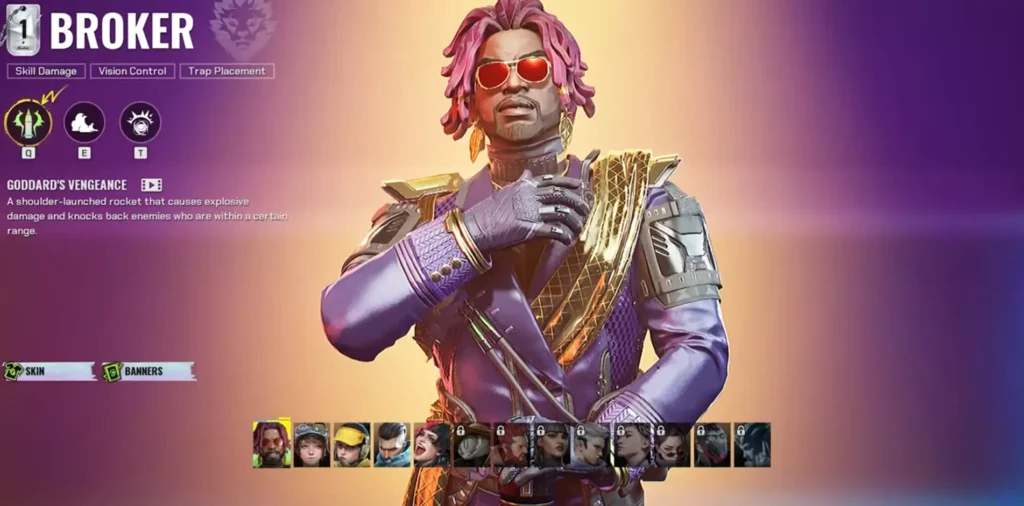
- Goddard’s Vengeance (Q): Launches a shoulder-fired rocket that deals area damage and knocks back enemies within its blast radius.
- Smokestack Lightning (E): Deploys a throwable device that releases a cloud of smoke upon impact.
- Cherry Bomb (T): A deployable that scatters multiple energy bombs on the ground, which detonate after a delay when approached by enemies.
Nitro
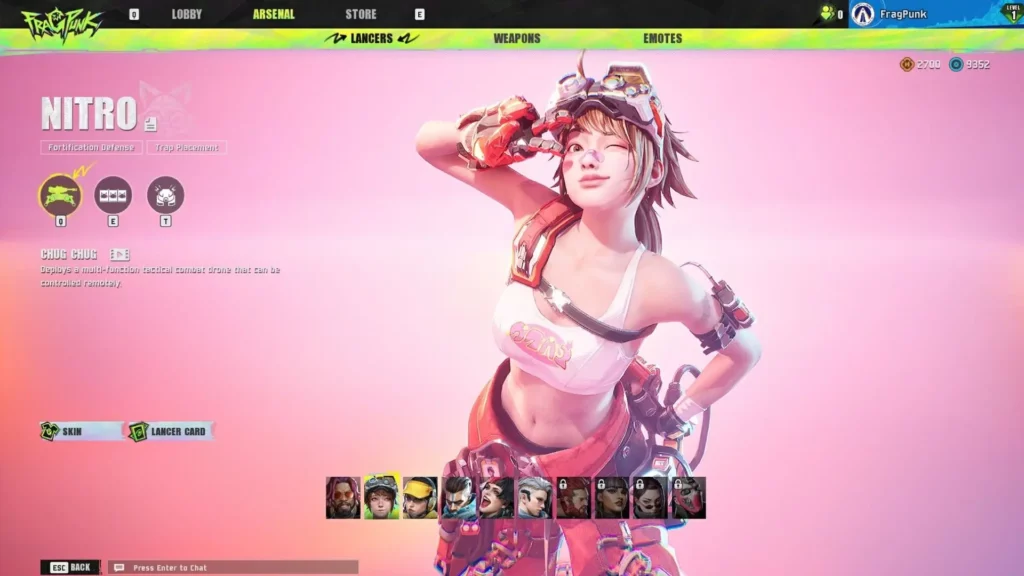
- Chug Chug (Q): Releases a multifunctional drone that can be remotely controlled.
- The Wall (E): Constructs a segmented energy shield at a targeted location.
- Mr. Pewpew (T): Deploys a sentry turret that automatically fires at targets.
Hollowpoint

- Meteora (Q): Fires a railgun with adjustable optics. When aiming down sights, the weapon charges and detects enemies.
- Smoke Screen (E): Emits a forward-propelling cloud that reveals enemies caught inside.
- Paparazzi (T): Drops an automatic tracking trap that attaches to a nearby opponent, revealing their position. It can be destroyed or manually removed.
Jaguar
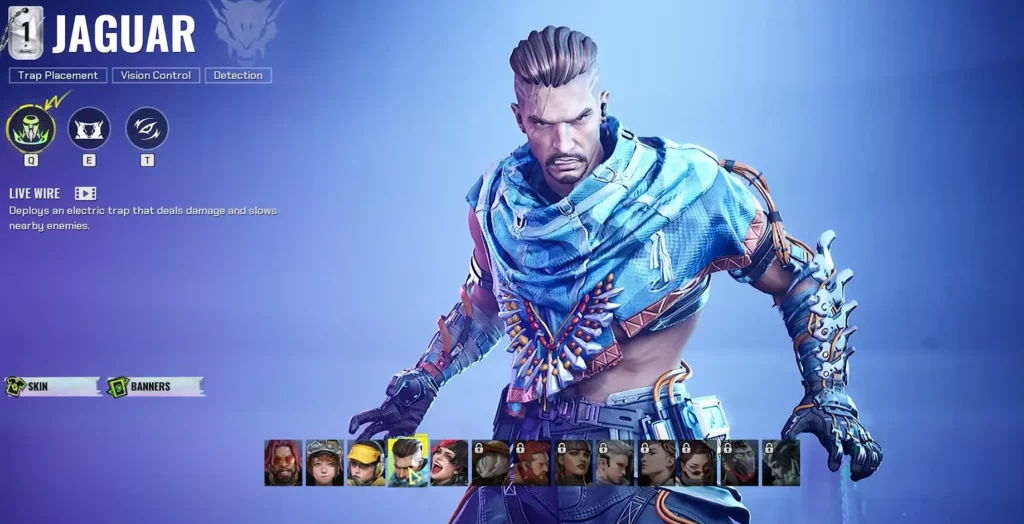
- Live Wire (Q): Deploys an electrified trap that slows and damages enemies in range.
- Electric Avenue (E): Summons an electric barrier in front that obscures enemy vision.
- I Can See For Miles (T): Reveals the number of enemies ahead and highlights weakened targets, boosting Jaguar’s movement speed.
Chum
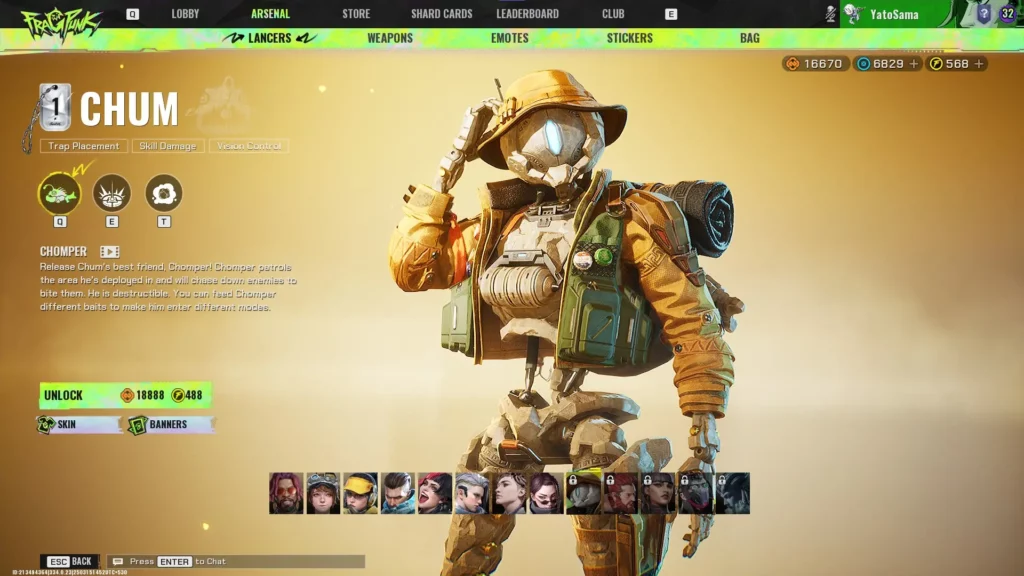
- Chomper (Q): Summons Chomper, an AI companion that patrols and bites enemies. Chomper can be enhanced by feeding different baits.
- Explosive Bait (E): Adheres to surfaces and explodes on trigger. Feeding it to Chomper puts him in Explosive Mode, prompting him to charge and explode.
- Smoking Bait (T): Generates smoke upon impact. When consumed by Chomper, he enters Smoke Mode, releasing continuous smoke while being steerable.
Corona

- Fast Lane (Q): Executes a quick dash. Vertical movement shortens the dash distance.
- Ashes to Ashes (E): Throws a device that creates a hazardous zone, inflicting light damage and granting Corona increased speed and damage resistance while inside.
- Hothead (T): After charging, blinds all enemies who are looking in Corona’s direction.
Serket
- Station to Station (Q): Grants invisibility and deploys a beacon that she can teleport to within a set time. Enemies visible to the beacon appear as sandstorms.
- Gold Dust Woman (E): Sends out a slow-moving dust vortex that impairs movement.
- Dilemma (T): A trap that pulls enemies into its radius.
Pathojen
- Emotional Rescue (Q): Tosses a healing device that restores HP within its area.
- Shroom Wall (E): Raises a breakable fungal barrier in doorways or on flat ground.
- Killer Queen (T): Deployable trap that causes damage over time. It can be activated manually or triggered by enemies.
- Chemical Romance (Passive): Grants immunity to poison.
Zephyr
- Midnight Rambler (Q): Engages in stealth mode with melee-only access. The effect ends if damage is taken or guns are used.
- Fade Away (E): Produces a zone where Zephyr stays invisible indefinitely while in Midnight Rambler. The cloak breaks temporarily if attacked.
- Get Back (T): Deploys a dagger beacon. Activating again teleports Zephyr to the beacon without disrupting stealth.
Spider
- Teleporter (Q): Places two portals that Spider can recall at will.
- Spirited Away (E): Deploys a trap that teleports nearby enemies to its original location after a delay.
- Spider Web (T): A trap that slows and briefly blinds those who activate it.
Kismet
- Hello, Goodbye (Q): Scans and reveals all enemies directly in front.
- Misery Angel (E): Throws a bomb that deals area damage, bypassing cover.
- Walk on the Wild Side (T): Enters Rift Walk, becoming untargetable and invisible, but unable to detect other Lancers.
Axon
- Electric Guitar (Q): Uses a guitar-shaped weapon that deals close-range damage. Right-click launches sticky bombs. Each kill replenishes two charges and enables a slide mechanic.
- Sticky Fingers (E): Fires bouncing sticky grenades. Holding the skill key throws additional ones.
- Super Freak (T): Grants temporary immunity to all blinding effects.
Sonar
- Echolocation (Q): Places a scanner that pings moving enemies periodically.
- Sonic Surge (E): Emits a wave that tags enemies and causes a delayed knockback explosion. Holding the button increases its range.
- Sound of Silence (T): Muffles the footsteps of Sonar and nearby allies. Also prevents detection by enemy Echolocation.